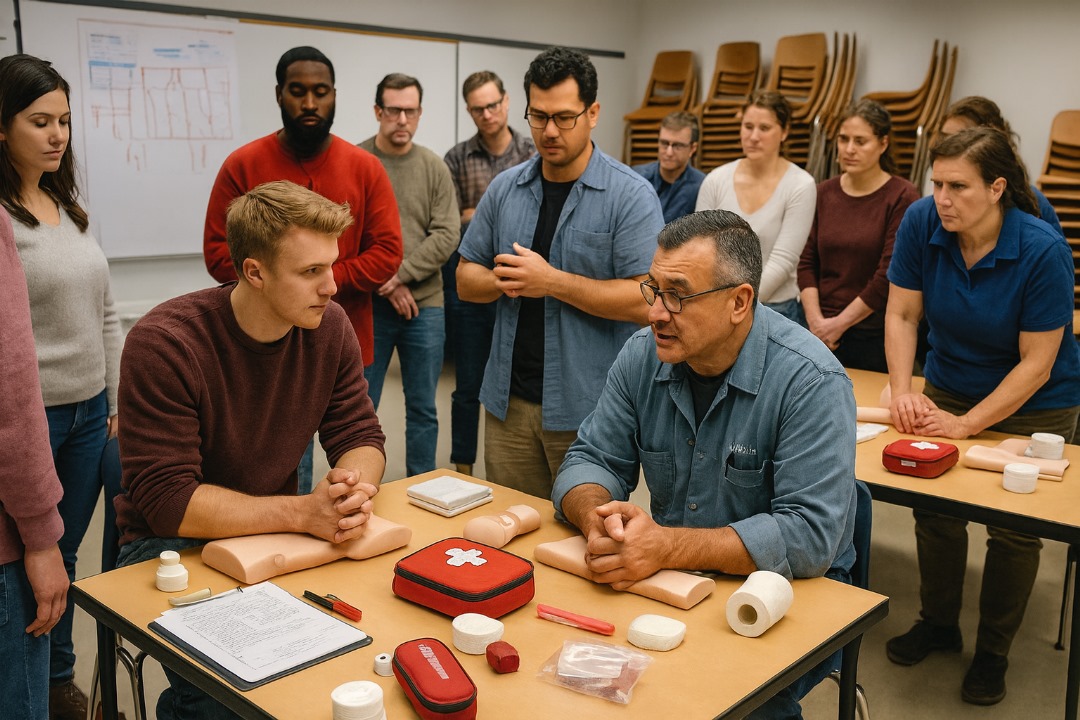
Introduction To First Aid
Understanding The Importance of First Aid
First aid is the immediate assistance or care given to someone who has been injured or suddenly taken ill before the arrival of professional medical help. It is a crucial skillset that can significantly impact the outcome of an emergency situation.
Here's why first aid is important:
Saves Lives: Perhaps the most obvious reason for the importance of first aid is its potential to save lives. In critical situations such as cardiac arrest, severe bleeding, or choking, immediate intervention can be the difference between life and death. Providing CPR, controlling bleeding, or clearing an obstructed airway can sustain vital functions until professional medical help arrives.
Prevents Further Injury or Harm: Injuries and illnesses can worsen if not promptly addressed. For instance, a small wound left untreated could become infected, leading to complications. By administering first aid quickly, you can prevent the escalation of injuries and mitigate potential risks, thus minimising long-term damage or disability.
Promotes Recovery: Effective first aid can promote faster recovery and better outcomes for the injured person. By stabilising their condition and providing appropriate care, you can alleviate pain, reduce complications, and expedite the healing process. This not only improves the individual's chances of full recovery but also enhances their overall well-being.
Reduces Pain and Discomfort: First aid interventions such as applying cold packs to reduce swelling or administering pain relief medication can help alleviate discomfort and provide immediate relief to the injured person. This compassionate aspect of first aid demonstrates care and support, which can be invaluable during times of distress.
Prevents Further Complications: Certain injuries or medical conditions, if not addressed promptly, can lead to complications or secondary injuries. For example, a sprained ankle left untreated could result in chronic instability or further damage to surrounding tissues. By providing timely first aid, you can prevent such complications and promote optimal recovery.
Empowers Individuals: Knowledge of first aid empowers individuals to take action in emergencies, regardless of their location or circumstances. Whether at home, work, or in public spaces, individuals trained in first aid can step forward confidently to assist those in need. This sense of empowerment fosters a culture of safety and preparedness within communities.
Fosters a Safer Environment: Implementing first aid training in workplaces, schools, and community settings creates a safer environment for everyone. Employees who are trained in first aid can respond effectively to workplace injuries or medical emergencies, reducing the risk of accidents and enhancing overall safety protocols.
Builds Resilience and Confidence: Learning first aid not only equips individuals with practical skills but also builds resilience and confidence in their ability to handle emergencies. Knowing that they have the knowledge and competence to provide assistance in crisis situations instils a sense of self-assurance and preparedness, both personally and professionally.
Strengthens Community Bonds: First aid training often involves teamwork and collaboration, fostering a sense of camaraderie and solidarity within communities. By working together to learn and practice life-saving skills, individuals strengthen social connections and become valuable assets in times of need.
In summary, the importance of first aid cannot be overstated. It is a fundamental aspect of emergency response that saves lives, prevents further harm, promotes recovery, and empowers individuals to take action in critical situations. By investing in first aid training and preparedness, we can create safer and more resilient communities where everyone has the confidence and capability to respond effectively to emergencies.
Legal and ethical considerations
Legal and ethical considerations are paramount when providing first aid. Understanding these aspects ensures that individuals administering aid do so responsibly and within the boundaries of the law. Here's a detailed explanation of the legal and ethical considerations in first aid:
Legal Considerations:
Duty of Care: When you provide first aid to someone, you automatically assume a duty of care towards them. This means that you have a legal obligation to act reasonably and prudently to prevent further harm to the injured person. Failing to provide aid in a situation where a duty of care is owed can result in legal consequences.
Good Samaritan Laws: Many jurisdictions have Good Samaritan laws that protect individuals who provide aid in good faith during emergencies. These laws typically offer legal immunity to bystanders who render assistance, as long as they do so without expectation of compensation and act within their level of training and competence.
Scope of Practice: It's crucial to understand the limits of your training and expertise when administering first aid. Performing medical procedures or interventions beyond your scope of practice can lead to legal liabilities, especially if harm results from your actions. Stick to basic first aid techniques and seek professional medical help when necessary.
Consent: In non-life-threatening situations, it's important to obtain consent before providing first aid. Consent ensures that the injured person understands the nature of the aid being offered and agrees to receive it voluntarily. In cases where the individual is unconscious or unable to provide consent, implied consent may apply, allowing you to provide aid based on the presumption that the person would consent if able to do so.
Documentation: Keeping accurate records of the first aid provided is advisable, especially in cases involving significant injuries or medical interventions. Documentation may include details such as the nature of the injury, actions taken, and any follow-up care recommended. This documentation can be crucial in legal proceedings or when reporting incidents to authorities.
Confidentiality: Respecting the confidentiality of the injured person is essential. Avoid discussing sensitive medical information with unauthorised individuals and refrain from sharing details of the incident without the individual's consent. Breaching confidentiality can lead to legal and ethical ramifications, as it violates the individual's privacy rights.
Ethical Considerations:
Non-Discrimination: When providing first aid, it's essential to treat all individuals with respect and without discrimination based on factors such as race, gender, religion, or socioeconomic status. Everyone deserves equal access to emergency medical care, and it's crucial to prioritise needs based on the severity of the injury rather than personal biases.
Autonomy: Respecting the autonomy of the injured person involves involving them in decision-making regarding their care whenever possible. Provide clear explanations of the available treatment options and respect their right to make informed choices about their medical treatment, taking into account their preferences and values.
Beneficence: The principle of beneficence guides first aid providers to act in the best interests of the injured person, striving to maximise benefits and minimise harm. This involves using your skills and knowledge to provide effective care while prioritising the well-being and safety of the individual above all else.
Veracity: Being honest and truthful in your interactions with the injured person is essential. Provide accurate information about their condition, the care being provided, and any potential risks or limitations. Honesty fosters trust and enables the individual to make informed decisions about their treatment and follow-up care.
Cultural Sensitivity: Recognising and respecting cultural differences is essential when providing first aid. Be mindful of cultural beliefs, practices, and preferences that may influence the individual's perceptions of health and illness. Tailor your approach to care to accommodate cultural diversity and ensure that the individual feels respected and understood.
In conclusion, legal and ethical considerations play a crucial role in first aid provision. By understanding and adhering to these principles, first aid providers can ensure that they act responsibly, protect the rights and dignity of the injured person, and contribute to positive outcomes in emergency situations.
ABCs of First Aid (Airway, Breathing, Circulation)
The ABCs of first aid—Airway, Breathing, Circulation—are fundamental principles that guide the initial assessment and management of a person experiencing a medical emergency, particularly in cases of cardiac arrest or respiratory distress. These principles help prioritise interventions based on the critical functions necessary to sustain life. Let's delve into each component:
Airway:
Assessment: The first step is to assess the person's airway for any obstructions that may impair breathing. Look for signs of airway obstruction, such as choking, stridor (noisy breathing), or difficulty speaking.
Management: If the airway is obstructed, perform the appropriate intervention to clear the obstruction. For conscious individuals with partial airway obstruction, encourage coughing or perform back blows and abdominal thrusts (Heimlich manoeuvre). For unconscious individuals, perform head-tilt, chin-lift manoeuvre to open the airway and remove any visible obstructions.
Maintenance: Once the airway is clear, ensure it remains patent by maintaining proper head positioning and monitoring for any signs of re-occlusion or obstruction.
Breathing:
Assessment: After ensuring a clear airway, assess the person's breathing. Look, listen, and feel for signs of breathing, such as chest rise and fall, breath sounds, and airflow.
Management: If the person is not breathing or breathing inadequately, initiate rescue breathing or CPR (Cardiopulmonary Resuscitation) as appropriate. For individuals in respiratory distress, provide reassurance and support while monitoring their breathing closely.
Maintenance: Continuously monitor the person's breathing throughout the emergency response process. Adjust interventions as needed based on changes in breathing patterns or response to treatment.
Circulation:
Assessment: Once airway and breathing are addressed, assess the person's circulation by checking for signs of a pulse and adequate blood circulation. This may involve checking the carotid pulse in the neck or assessing peripheral pulses.
Management: If no pulse is detected or if circulation is inadequate, initiate CPR immediately to maintain blood flow and oxygenation to vital organs. Follow established protocols for chest compressions and rescue breaths.
Maintenance: Continuously monitor the person's circulation during CPR, assessing for the return of spontaneous circulation (ROSC) or signs of improvement. Administer appropriate interventions, such as defibrillation with an AED (Automated External Defibrillator), as indicated.
It's important to remember that the ABCs of first aid are not sequential steps but rather simultaneous considerations. While you may initially assess airway, breathing, and circulation in a structured manner, the management of these components often occurs concurrently based on the individual's condition and response to interventions. Additionally, always prioritise personal safety when providing first aid and be prepared to seek professional medical assistance if the person's condition does not improve or deteriorates despite initial interventions. Regular training and practice in first aid techniques, including the ABCs, are essential for maintaining readiness and effectiveness in emergency situations.
Basic Life Support (BLS)
Basic Life Support (BLS) is a critical skill that enables individuals to provide immediate assistance to someone experiencing a cardiac emergency. Recognising cardiac emergencies is the first step in initiating timely and appropriate interventions to improve the person's chances of survival.
Recognising cardiac emergencies
Know the Signs and Symptoms:
Chest Pain or Discomfort: This is one of the most common symptoms of a heart attack. The chest pain may feel like pressure, squeezing, fullness, or pain that may come and go.
Shortness of Breath: Difficulty breathing or sudden shortness of breath can indicate a cardiac emergency, especially if it occurs without any apparent cause.
Nausea, Vomiting, or Indigestion: These symptoms, particularly when accompanied by chest discomfort, may signal a heart attack.
Pain or Discomfort in Other Areas of the Upper Body: This can include pain or discomfort in one or both arms, the back, neck, jaw, or stomach.
Sweating, Cool, Pale Skin: Profuse sweating, cold or clammy skin, and a pale complexion may be signs of a heart attack or other cardiac event.
Dizziness or Light-headedness: Feeling faint, dizzy, or lightheaded, especially when accompanied by other symptoms, can indicate a cardiac emergency.
Recognise Cardiac Arrest:
Loss of Consciousness: A person experiencing sudden cardiac arrest may collapse and lose consciousness without warning.
Absence of Pulse or Breathing: Check for signs of breathing and a pulse. If the person is not breathing normally and you cannot detect a pulse, it may indicate cardiac arrest.
Understand Risk Factors:
Age: While heart attacks and cardiac emergencies can occur at any age, the risk increases with age, particularly for individuals over 65.
Family History: A family history of heart disease or cardiac events can increase an individual's risk.
Smoking: Tobacco use, including smoking cigarettes or exposure to second hand smoke, is a significant risk factor for heart disease and cardiac emergencies.
High Blood Pressure: Hypertension increases the risk of heart attacks and other cardiovascular events.
High Cholesterol: Elevated levels of cholesterol in the blood can lead to the formation of plaque in the arteries, increasing the risk of heart disease.
Obesity: Being overweight or obese increases the strain on the heart and is associated with a higher risk of heart disease.
Lack of Physical Activity: Sedentary lifestyles contribute to poor cardiovascular health and increase the risk of cardiac emergencies.
Consider Other Factors:
Medical History: Individuals with a history of heart disease, diabetes, or other chronic conditions are at higher risk of cardiac emergencies.
Stress and Anxiety: Acute stress or anxiety can trigger cardiac events in susceptible individuals.
Drug and Alcohol Use: Substance abuse, including the use of illicit drugs and excessive alcohol consumption, can increase the risk of cardiac emergencies.
Trust Your Instincts:
If you suspect someone is experiencing a cardiac emergency, don't hesitate to take action. Time is critical in these situations, and early intervention can significantly improve outcomes.
Recognising cardiac emergencies requires vigilance, awareness of common symptoms, and an understanding of risk factors. By promptly recognising the signs of a cardiac emergency and initiating appropriate interventions, you can help improve the person's chances of survival and recovery. Remember, if you suspect someone is experiencing a cardiac emergency, call emergency medical services immediately and begin CPR if necessary.
Performing CPR (Cardiopulmonary Resuscitation)
Performing CPR (Cardiopulmonary Resuscitation) is a crucial skill that can save lives in the event of cardiac arrest or respiratory failure. CPR involves a series of chest compressions and rescue breaths to maintain blood circulation and oxygenation until professional medical help arrives. Here's a step-by-step guide on how to perform CPR effectively:
1. Assess the Scene:
Ensure the scene is safe for both you and the victim before approaching.
If it's safe to do so, approach the victim and check for responsiveness.
2. Check for Responsiveness:
Gently tap the victim's shoulders and ask loudly, "Are you okay?"
Look for any signs of responsiveness, such as movement, breathing, or moaning.
If the victim does not respond and is not breathing normally, or only gasping, they may be in cardiac arrest.
3. Call for Help:
If you're alone, call emergency medical services (EMS) immediately or ask someone nearby to call while you begin CPR.
Provide clear instructions, including the location and nature of the emergency.
4. Open the Airway:
Carefully place the victim on their back on a firm surface.
Tilt the head back and lift the chin to open the airway. Use the head-tilt, chin-lift manoeuvre.
Check for any obstructions in the mouth or throat and remove them if possible.
5. Check for Breathing:
Look, listen, and feel for signs of normal breathing for no more than 10 seconds.
Watch for chest rise and fall, listen for breath sounds, and feel for airflow on your cheek.
6. Start Chest Compressions:
If the victim is not breathing normally, or only gasping, begin chest compressions immediately.
Place the heel of one hand on the center of the victim's chest, between the nipples.
Place the other hand on top of the first hand, interlocking the fingers.
Position yourself directly over the victim's chest, with your shoulders aligned over your hands.
Lock your elbows and keep your arms straight.
Compress the chest at least 2 inches (5 centimeters) deep and at a rate of 100 to 120 compressions per minute.
Allow the chest to fully recoil between compressions.
7. Perform Rescue Breaths:
After 30 compressions, provide two rescue breaths.
Pinch the victim's nose shut and create a tight seal over their mouth with yours.
Give a breath that lasts about 1 second and makes the chest rise.
If the breaths do not make the chest rise, reposition the head and try again.
Continue with cycles of 30 compressions and 2 breaths until help arrives, an AED (Automated External Defibrillator) is ready to use, or the victim shows signs of life.
8. Use an AED (if available):
If an AED is available, turn it on and follow the prompts.
Apply the AED pads to the victim's bare chest as indicated by the device.
Follow the AED's voice or visual prompts for delivering a shock if advised.
9. Continue CPR Until Help Arrives:
Continue CPR until emergency medical services (EMS) personnel arrive and take over, or until the victim shows signs of life and begins to breathe normally.
Remember, performing CPR promptly and correctly can significantly improve the chances of survival for someone experiencing cardiac arrest. Regular training and practice are essential to maintain proficiency in CPR skills. If you're unsure about performing CPR, remember that any attempt to provide assistance is better than no action at all.
Using an Automated External Defibrillator (AED)
Using an Automated External Defibrillator (AED) is a critical step in the chain of survival for individuals experiencing sudden cardiac arrest. AEDs are portable devices designed to analyse the heart's rhythm and deliver an electric shock if necessary to restore a normal heart rhythm. Here's a step-by-step guide on how to use an AED effectively:
1. Assess the Scene:
Ensure the area is safe for both you and the victim before approaching.
If it's safe to do so, assess the victim's condition and determine if they are unresponsive and not breathing normally.
2. Call for Help:
If you're alone, call emergency medical services (EMS) immediately or ask someone nearby to call while you retrieve the AED.
Provide clear instructions, including the location and nature of the emergency.
3. Retrieve the AED:
Locate the nearest AED and bring it to the victim's side.
AEDs are commonly found in public areas such as airports, shopping malls, gyms, and offices. They are often stored in easily accessible cabinets or wall-mounted cases.
4. Power On the AED:
Turn on the AED by pressing the power button, usually located on the front or side of the device.
The AED will typically provide voice prompts or visual instructions to guide you through the process.
5. Attach Electrode Pads:
Open the electrode pads package and remove the pads from their packaging.
Peel the backing off the electrode pads and place them on the victim's bare chest, following the placement diagram provided on the pads.
One pad should be placed on the upper right side of the chest, just below the collarbone, and the other pad on the lower left side of the chest, just below the armpit.
6. Analyse Heart Rhythm:
Ensure that no one is touching the victim while the AED analyses the heart rhythm.
Press the analyse button or follow the AED's voice prompt to begin the rhythm analysis.
The AED will analyse the victim's heart rhythm and determine if a shock is advised.
7. Clear the Victim:
If a shock is advised, ensure that no one is touching the victim or is in contact with any surfaces touching the victim.
Follow the AED's voice prompt or visual instructions to press the shock button, if necessary.
8. Perform CPR:
After delivering a shock, resume CPR (Cardiopulmonary Resuscitation) immediately, starting with chest compressions.
Follow the AED's prompts for the timing and duration of CPR cycles.
9. Follow AED Prompts:
Continue to follow the AED's voice prompts or visual instructions throughout the resuscitation process.
The AED will guide you through additional shocks, if needed, and provide prompts for when to resume CPR.
10. Continue Until Help Arrives:
Continue CPR and follow the AED's instructions until emergency medical services (EMS) personnel arrive and take over resuscitation efforts.
Using an AED promptly and correctly can significantly improve the chances of survival for someone experiencing sudden cardiac arrest. Remember, AEDs are designed to be user-friendly, and their voice prompts provide clear instructions to guide rescuers through the process. Regular training and practice in AED use are essential for maintaining proficiency and readiness to respond in emergency situations.
Bleeding and Wound Care
Bleeding and wound care are essential aspects of first aid, as proper management can prevent infection, promote healing, and minimise complications. Understanding the types of wounds is crucial for providing appropriate care.
Types of wounds (abrasions, lacerations, punctures)
1. Abrasions:
Description: Abrasions, also known as scrapes or grazes, occur when the skin is rubbed or scraped against a rough surface, causing the superficial layers of the skin to be abraded or removed.
Characteristics: Abrasions are typically shallow wounds that may involve minor bleeding, pain, and raw or reddened skin. They often occur on exposed areas such as the knees, elbows, or palms.
First Aid:
Clean the wound with mild soap and water to remove dirt and debris.
Apply an over-the-counter antibiotic ointment or petroleum jelly to keep the wound moist and promote healing.
Cover the abrasion with a sterile adhesive bandage or gauze dressing to protect it from further injury and reduce the risk of infection.
Monitor the wound for signs of infection, such as increased redness, swelling, warmth, or drainage, and seek medical attention if necessary.
2. Lacerations:
Description: Lacerations are cuts or tears in the skin that result from sharp objects or trauma, causing the skin and underlying tissues to be torn or jagged.
Characteristics: Lacerations vary in depth and severity, ranging from superficial cuts to deep wounds that may involve muscle, tendon, or bone. They often produce significant bleeding and may be accompanied by pain, swelling, and tissue damage.
First Aid:
Apply direct pressure to the wound using a clean cloth or sterile gauze to control bleeding.
Clean the wound with mild soap and water to remove debris and reduce the risk of infection.
If the laceration is deep or gaping, seek medical attention for evaluation and possible closure with stitches (sutures) or wound adhesive.
Cover the laceration with a sterile dressing or bandage to protect it from contamination and promote healing.
Monitor the wound for signs of infection and follow any additional care instructions provided by a healthcare professional.
3. Punctures:
Description: Puncture wounds occur when a sharp object penetrates the skin, creating a small, deep hole or puncture in the tissue. Common causes include nails, needles, or sharp instruments.
Characteristics: Puncture wounds may not bleed significantly externally, but they can cause damage to deeper tissues and increase the risk of infection. Foreign objects may become lodged in the wound, requiring careful removal to prevent further injury.
First Aid:
Control bleeding, if present, by applying direct pressure around the wound.
Clean the puncture wound thoroughly with soap and water, irrigating the area to remove any debris or foreign material.
Avoid probing or enlarging the wound, as this can introduce bacteria and increase the risk of infection.
If a foreign object is embedded in the wound, do not attempt to remove it yourself. Seek medical attention for evaluation and proper removal.
Cover the puncture wound with a sterile dressing or bandage to protect it from contamination and monitor for signs of infection.
Regardless of the type of wound, it's important to assess the severity of the injury, control bleeding, clean the wound thoroughly, and apply appropriate dressings or bandages to promote healing and prevent infection. Seek medical attention for wounds that are deep, jagged, or show signs of infection, as they may require professional evaluation and treatment.
Controlling bleeding
Controlling bleeding is a critical skill in first aid, as excessive blood loss can lead to shock, organ damage, and even death. Here are the steps to effectively control bleeding:
1. Assess the Situation:
Before intervening, ensure your own safety and assess the severity of the bleeding.
Determine if the bleeding is minor, moderate, or severe.
2. Apply Direct Pressure:
For most bleeding wounds, applying direct pressure is the first and most effective step to control bleeding.
Use a clean cloth, sterile gauze pad, or your gloved hand to apply firm pressure directly over the wound.
Maintain pressure for at least 5-10 minutes, allowing time for clot formation.
3. Elevate the Wound:
If possible, elevate the injured area above the level of the heart to reduce blood flow to the wound.
Elevating the wound can help slow the bleeding and promote clotting.
4. Use Pressure Points:
If direct pressure alone is not sufficient to control bleeding, you can apply pressure to specific pressure points to reduce blood flow to the injured area.
Common pressure points include:
Brachial artery (inside of upper arm)
Femoral artery (groin)
Radial artery (wrist)
Carotid artery (neck)
5. Apply Tourniquet (as a Last Resort):
A tourniquet should only be used as a last resort for life-threatening bleeding that cannot be controlled by direct pressure or other methods.
Use a wide, flat band (such as a commercial tourniquet or improvised band) and place it proximal (above) the bleeding wound.
Tighten the tourniquet until the bleeding stops. Note the time the tourniquet was applied.
Continuously monitor the person's condition and be prepared to release the tourniquet if necessary to prevent further complications.
6. Seek Medical Help:
Regardless of the severity of the bleeding, seek medical help promptly, especially if the bleeding is severe or cannot be controlled with basic first aid measures.
Call emergency medical services (EMS) or transport the person to the nearest healthcare facility for further evaluation and treatment.
7. Monitor the Person:
After bleeding is controlled, continue to monitor the person's condition closely.
Watch for signs of shock, such as pale or clammy skin, rapid breathing, weakness, or altered mental status.
Provide comfort and reassurance while awaiting professional medical help.
It's important to note that while controlling bleeding is essential, maintaining the person's airway, breathing, and circulation (ABCs) should always take precedence in first aid. Always prioritise your own safety when providing assistance and be prepared to seek professional medical help if necessary. Regular training and practice in first aid techniques, including bleeding control, are essential for preparedness in emergency situations.
Dressing and bandaging techniques
Dressing and bandaging techniques are essential skills in first aid for covering and protecting wounds, controlling bleeding, and promoting healing. Proper dressing and bandaging help prevent infection, reduce pain, and provide support to injured areas. Here's a step-by-step guide on dressing and bandaging techniques:
1. Gather Supplies:
Before starting, gather the necessary supplies, including sterile dressings, gauze pads, adhesive bandages, medical tape, and scissors.
Wash your hands thoroughly with soap and water or use hand Sanitiser to reduce the risk of introducing infection.
2. Prepare the Wound:
Clean the wound with mild soap and water to remove debris, dirt, and bacteria.
Rinse the wound gently under running water, if available, or use a sterile saline solution to irrigate the area.
Pat the surrounding skin dry with a clean towel or sterile gauze.
3. Apply an Antibiotic Ointment (if necessary):
If recommended or prescribed by a healthcare professional, apply a thin layer of antibiotic ointment to the wound to prevent infection and promote healing.
4. Select the Appropriate Dressing:
Choose a dressing that is appropriate for the size, type, and location of the wound.
Sterile gauze pads are commonly used for covering wounds, while adhesive bandages are suitable for smaller cuts and abrasions.
5. Place the Dressing:
Carefully place the sterile dressing over the wound, ensuring that it covers the entire area and extends slightly beyond the edges of the wound.
If using multiple dressings, layer them to absorb excess moisture and provide additional protection.
6. Secure the Dressing with Bandage:
Use medical tape or a self-adhesive bandage to secure the dressing in place.
Start by anchoring the bandage on one side of the dressing, wrapping it around the wound site without pulling too tightly.
Continue wrapping the bandage in a spiral or figure-eight pattern, overlapping each layer slightly to ensure even compression and support.
Avoid wrapping too tightly, as this can impair circulation and cause discomfort.
7. Check Circulation and Sensation:
After applying the bandage, check the person's circulation and sensation in the affected area.
Ensure that the bandage is not too tight and does not impede blood flow or cause numbness, tingling, or discoloration of the skin.
If the person experiences increased pain, swelling, or changes in sensation, loosen the bandage or seek medical attention.
8. Secure the Ends and Reassess:
Secure the end of the bandage with medical tape or a clip to prevent it from unravelling.
Reassess the dressing and bandage periodically, checking for signs of bleeding, infection, or other complications.
9. Provide Instructions:
Provide the person with instructions on how to care for the wound and change the dressing, if necessary.
Advise them to keep the wound clean and dry, avoid picking or scratching at the dressing, and seek medical attention if signs of infection develop.
10. Document and Monitor:
Document the dressing and bandaging procedure, including the type of dressing used, the date and time of application, and any relevant observations.
Monitor the wound regularly for signs of healing, infection, or other complications, and adjust the dressing and bandage as needed.
By following these dressing and bandaging techniques, you can effectively cover and protect wounds, promote healing, and provide comfort and support to injured individuals. Regular training and practice in first aid procedures are essential for developing proficiency and confidence in managing various types of injuries and emergencies.
Fractures, Sprains, and Strains
Identifying fractures, sprains, and strains
Identifying fractures, sprains, and strains is essential for providing appropriate first aid and determining the appropriate course of action for treatment. Here's how to differentiate between these three types of injuries:
1. Fractures:
A fracture is a break or crack in a bone resulting from trauma, injury, or overuse. Fractures can range from hairline cracks to complete breaks that cause the bone to separate into two or more pieces.
Signs and Symptoms:
Intense pain at the site of the injury, which may worsen with movement.
Swelling, bruising, or deformity around the affected area.
Inability to bear weight or use the injured limb.
Loss of mobility or range of motion.
Crepitus (a grating or popping sensation) may be felt or heard if the bone fragments rub against each other.
First Aid:
Immobilise the injured limb or area to prevent further movement and reduce pain.
Apply a splint or makeshift immobilisation device to stabilise the fracture.
Control swelling by applying ice packs or cold compresses to the affected area.
Seek medical attention promptly for further evaluation and treatment, which may include X-rays, realignment (reduction), and casting or surgery.
2. Sprains:
A sprain is an injury to a ligament, the tough bands of fibrous tissue that connect bones to each other at joints. Sprains typically occur when a joint is twisted or overstretched beyond its normal range of motion.
Signs and Symptoms:
Pain, tenderness, or soreness around the affected joint.
Swelling and bruising, usually within hours of the injury.
Limited range of motion or difficulty moving the joint.
Instability or a feeling of "giving way" in the joint.
First Aid:
Rest the injured joint and avoid putting weight or stress on it.
Apply ice packs or cold compresses to reduce swelling and pain.
Elevate the injured limb above the level of the heart to minimise swelling.
Compress the affected area with an elastic bandage or compression wrap to provide support and reduce swelling.
Seek medical attention if the pain and swelling are severe, or if the joint is unstable or unable to bear weight.
3. Strains:
A strain is an injury to a muscle or tendon, the fibrous cords that attach muscles to bones. Strains typically occur when muscles are stretched or torn due to overexertion, sudden movements, or repetitive use.
Signs and Symptoms:
Pain, tenderness, or stiffness in the affected muscle or tendon.
Swelling, bruising, or muscle spasms.
Weakness or difficulty using the injured muscle.
Limited range of motion or difficulty moving the affected limb.
First Aid:
Rest the injured muscle or tendon and avoid activities that aggravate pain or discomfort.
Apply ice packs or cold compresses to reduce swelling and pain.
Use compression wraps or bandages to provide support and stability to the injured area.
Elevate the injured limb to reduce swelling and promote drainage.
Take over-the-counter pain relievers, if necessary, to alleviate pain and inflammation.
Seek medical attention if the strain is severe, or if symptoms persist despite home treatment.
Differentiating between fractures, sprains, and strains is crucial for providing appropriate first aid and ensuring the proper management and treatment of these injuries. If there is any uncertainty about the nature or severity of the injury, it's essential to seek medical attention for further evaluation and care.
Immobilisation techniques
Immobilisation techniques are used to stabilise injured body parts, prevent further damage, and promote healing. Proper immobilisation helps reduce pain, swelling, and the risk of complications associated with certain injuries. Here are some common immobilisation techniques for different types of injuries:
1. Splinting:
Splinting involves immobilising a fractured or injured limb using rigid materials such as wood, metal, or plastic. Splints are applied to provide support and stability while preventing movement of the injured area.
To apply a splint:
Select a suitable splinting material, such as a padded board, rolled-up newspaper, or commercially available splint.
Position the injured limb in its natural alignment, avoiding any excessive bending or twisting.
Place the splint along the length of the injured limb, securing it firmly in place using bandages, adhesive tape, or cloth strips.
Pad the splint to provide cushioning and support to the injured area, ensuring that pressure points are avoided.
Check the circulation, sensation, and colour of the extremity distal to the splint before and after application to ensure adequate blood flow.
2. Sling and Swathe:
A sling and swathe are commonly used to immobilise and support an injured arm, particularly in cases of shoulder or upper arm injuries such as fractures or dislocations.
To apply a sling and swathe:
Place the injured arm in a comfortable position across the chest, with the elbow bent at a 90-degree angle.
Fold a triangular bandage or cloth into a sling shape and place it under the arm, bringing the ends up and around the neck.
Tie the ends of the sling securely behind the neck, ensuring that the arm is supported and elevated slightly.
Use a second bandage or cloth to wrap around the torso and the injured arm, securing it in place and preventing excessive movement.
3. Traction:
Traction is a technique used to align and immobilise fractured or dislocated bones by applying a pulling force to the affected limb. Traction is often used in conjunction with splinting or casting to maintain proper alignment and promote healing.
Traction can be applied using manual or mechanical methods, such as weights, pulleys, or specialised traction devices.
Traction should be performed under the supervision of a trained healthcare professional to ensure proper technique and minimise the risk of complications.
4. Vacuum Splints:
Vacuum splints are specialised splinting devices that use vacuum pressure to conform to the shape of the injured limb, providing Customised support and immobilisation.
Vacuum splints are particularly useful for immobilising fractures, sprains, and strains of the extremities, as they offer superior support and stability while minimising pressure points and discomfort.
To apply a vacuum splint, place the injured limb inside the splint and use a vacuum pump to remove air from the splint, creating a snug and secure fit around the limb.
5. Cervical Collars:
Cervical collars are used to immobilise the neck and cervical spine in cases of suspected neck injuries, such as whiplash, cervical fractures, or spinal cord injuries.
Cervical collars provide support and restrict movement of the neck to prevent further injury and stabilise the spine.
Cervical collars should be applied carefully and adjusted to ensure proper alignment of the head and neck while allowing for adequate ventilation and comfort.
When applying immobilisation techniques, it's important to consider the nature and severity of the injury, as well as the individual's condition and comfort. Proper assessment, positioning, and padding are essential to ensure effective immobilisation and minimise the risk of complications. If there is any uncertainty about the appropriate immobilisation technique or the severity of the injury, seek medical attention for further evaluation and care.
When to seek professional medical help
Knowing when to seek professional medical help is crucial for ensuring timely and appropriate treatment of injuries and medical emergencies. While many minor injuries and illnesses can be managed at home with basic first aid, certain signs and symptoms warrant immediate medical attention. Here are some situations in which it's important to seek professional medical help:
1. Difficulty Breathing:
Difficulty breathing, shortness of breath, or wheezing can be signs of serious respiratory problems, such as asthma exacerbation, allergic reactions, or pneumonia.
2. Chest Pain or Pressure:
Chest pain or pressure can indicate a heart attack, angina, pulmonary embolism, or other cardiovascular problems. Seek emergency medical attention if chest pain is severe, prolonged, or accompanied by other symptoms such as shortness of breath, dizziness, nausea, or sweating.
3. Uncontrolled Bleeding:
If bleeding cannot be controlled with direct pressure or is profuse, seek medical help immediately. Severe bleeding can lead to shock and requires prompt intervention to stop the bleeding and prevent complications.
4. Loss of Consciousness:
Loss of consciousness, fainting, or sudden collapse may be caused by various medical conditions, including seizures, strokes, heart arrhythmias, or hypoglycaemia. Seek medical help if someone loses consciousness, especially if they do not regain consciousness quickly.
5. Head Injury:
Head injuries, including concussions and traumatic brain injuries (TBIs), require medical evaluation, particularly if there is loss of consciousness, persistent headache, confusion, vomiting, or changes in behaviour or cognition.
6. Severe Pain or Discomfort:
Severe or persistent pain that does not respond to over-the-counter pain relievers may indicate a serious underlying condition, such as appendicitis, kidney stones, or internal organ injury. Seek medical attention for severe or unexplained pain.
7. Suspected Fractures or Dislocations:
Suspected fractures or dislocations require medical evaluation and imaging to confirm the diagnosis and ensure proper treatment. Avoid moving the injured area unnecessarily and seek medical help promptly.
8. Sudden Weakness or Numbness:
Sudden weakness, numbness, or paralysis, especially on one side of the body, may be signs of a stroke or transient ischemic attack (TIA). Seek immediate medical attention if these symptoms occur.
9. Severe Allergic Reactions:
Severe allergic reactions, known as anaphylaxis, can cause difficulty breathing, swelling of the face or throat, rapid heartbeat, and loss of consciousness. Administer epinephrine (if available) and seek emergency medical help immediately.
10. High Fever with Severe Symptoms:
High fever (above 103°F or 39.4°C) accompanied by severe symptoms such as confusion, difficulty breathing, persistent vomiting, or severe headache may indicate a serious infection or medical condition requiring urgent medical attention.
In general, if you are unsure about the severity of a medical problem or if you feel that the situation requires immediate attention, it is better to err on the side of caution and seek medical help promptly. Trust your instincts and prioritise safety when deciding whether to seek professional medical assistance.
Burns and Scalds
Understanding degrees of burns
Understanding the degrees of burns is crucial for assessing the severity of the injury and determining the appropriate course of treatment. Burns are classified into three primary degrees based on the depth and extent of tissue damage. Here's an overview of each degree of burn:
1. First-Degree Burns:
First-degree burns, also known as superficial burns, affect only the outer layer of the skin (epidermis).
Signs and Symptoms:
Redness
Mild swelling
Pain
Dry, peeling skin
Healing Time: Typically heals within 3 to 6 days without scarring.
Treatment:
Cool the burned area with cool running water or a cold compress for several minutes to alleviate pain and reduce swelling.
Apply aloe vera gel or a moisturising lotion to soothe the skin.
Take over-the-counter pain relievers, if necessary, to relieve discomfort.
Avoid applying ice directly to the burn, as it can further damage the skin.
2. Second-Degree Burns:
Second-degree burns, also known as partial-thickness burns, affect the outer layer of the skin (epidermis) and part of the underlying layer (dermis).
Signs and Symptoms:
Redness
Blistering
Severe pain
Swelling
Moist, shiny appearance
Healing Time: Can take several weeks to heal and may result in scarring.
Treatment:
Cool the burned area with cool running water or a cold compress for several minutes to alleviate pain and reduce swelling.
Gently clean the burn with mild soap and water to prevent infection.
Apply an antibiotic ointment or aloe vera gel to promote healing and prevent infection.
Cover the burn with a sterile, non-adhesive dressing or clean, dry cloth.
Seek medical attention for large or deep second-degree burns, burns on the face, hands, feet, or genitals, or if signs of infection develop.
3. Third-Degree Burns:
Third-degree burns, also known as full-thickness burns, extend through the entire thickness of the skin and may also damage underlying tissues, muscles, and bones.
Signs and Symptoms:
White, charred, or blackened skin
Dry, leathery texture
Numbness due to nerve damage (may not be painful)
Swelling
Healing Time: Third-degree burns require medical intervention and may require surgical treatment, skin grafting, or other specialised care. Healing time varies depending on the severity of the burn and the extent of tissue damage.
Treatment:
Seek immediate medical attention for third-degree burns. Do not attempt to treat these burns at home.
Cover the burn with a clean, dry cloth or sterile dressing to protect it from further injury and reduce the risk of infection.
Do not attempt to remove clothing or objects stuck to the burn, as this can cause further damage.
Keep the person warm and comfortable while awaiting medical help.
It's important to note that burns can be complicated by factors such as the size and location of the burn, the age and overall health of the person, and the presence of other injuries or medical conditions. For severe burns, seek emergency medical attention immediately. Additionally, if a burn covers a large area of the body, is located on the face, hands, feet, or genitals, or is accompanied by signs of infection such as increased pain, redness, swelling, or drainage, medical attention should be sought promptly. Prompt and appropriate treatment of burns can help minimise pain, reduce scarring, and promote optimal healing.
First aid for thermal, chemical, and electrical burns
First aid for thermal, chemical, and electrical burns involves different approaches due to the distinct nature of each type of burn. Here's a comprehensive guide on how to provide first aid for each type of burn:
1. Thermal Burns:
Thermal burns occur when the skin comes into contact with hot objects, flames, steam, or hot liquids.
First Aid:
Stop the burning process: Remove the person from the source of heat or flames and smother any flames on clothing by covering them with a blanket or rolling the person on the ground.
Cool the burn: Immediately cool the burned area with cool running water or apply a cold, wet compress for several minutes to reduce pain and swelling. Do not use ice or ice water, as it can further damage the skin.
Remove clothing and jewellery: Carefully remove clothing and jewellery from the burned area, unless they are stuck to the skin. Avoid pulling off any clothing that is stuck to the burn.
Protect the burn: Cover the burn with a clean, dry cloth or sterile dressing to protect it from further injury and reduce the risk of infection.
Provide pain relief: Administer over-the-counter pain relievers such as ibuprofen or acetaminophen to alleviate pain and discomfort.
Seek medical attention: Seek medical help for severe burns, burns involving the face, hands, feet, or genitals, or if the burn covers a large area of the body.
2. Chemical Burns:
Chemical burns occur when the skin or eyes come into contact with corrosive or irritating chemicals, such as acids, alkalis, solvents, or cleaning products.
First Aid:
Remove the person from the source of the chemical: Move the person away from the area containing the chemical and avoid further exposure.
Remove contaminated clothing: Carefully remove any clothing or jewellery that may be contaminated with the chemical, taking care to avoid spreading the chemical to unaffected areas.
Flush the affected area with water: Immediately flush the burned area with large amounts of cool running water for at least 20 minutes to remove the chemical and dilute it. Continue flushing while removing contaminated clothing.
Protect the burn: Cover the burn with a clean, dry cloth or sterile dressing to protect it from further injury and reduce the risk of infection.
Seek medical attention: Seek emergency medical help for chemical burns, as they can cause significant tissue damage and require specialised treatment.
3. Electrical Burns:
Electrical burns occur when the skin comes into contact with an electrical current, such as from exposed wiring, electrical appliances, or lightning.
First Aid:
Ensure safety: Ensure that the area is safe before approaching the person to avoid the risk of electrocution. Turn off the power source or use a non-conductive object to separate the person from the electrical source.
Check for other injuries: Assess the person for signs of other injuries, such as burns, fractures, or cardiac arrest. Provide CPR if necessary.
Assess the burn: Examine the burned area for signs of entry and exit wounds, as electrical currents can cause damage beneath the skin's surface.
Cool the burn: If the burn is minor, cool the burned area with cool running water for several minutes to reduce pain and swelling.
Protect the burn: Cover the burn with a clean, dry cloth or sterile dressing to protect it from further injury and reduce the risk of infection.
Seek medical attention: Seek medical help for electrical burns, especially if the person experiences loss of consciousness, difficulty breathing, irregular heartbeat, or other serious symptoms.
In all cases of burns, it's essential to monitor the person's condition closely, provide comfort and reassurance, and seek medical attention promptly for severe burns or burns that involve sensitive areas of the body. Remember to prioritise your own safety when providing first aid for burns and take precautions to avoid exposure to hazardous substances or electrical hazards.
Preventing infection and promoting healing
Preventing infection and promoting healing are essential steps in the first aid management of burns, wounds, and other injuries. Here are some strategies to prevent infection and facilitate the healing process:
1. Clean the Wound:
Thoroughly clean the wound with mild soap and water to remove dirt, debris, and bacteria. Use a gentle stream of water or a clean cloth to irrigate the wound and ensure proper cleansing.
Avoid using harsh chemicals or antiseptics, as they can damage healthy tissues and delay healing.
2. Apply Antibiotic Ointment:
Apply a thin layer of antibiotic ointment or an over-the-counter antiseptic cream to the wound to prevent infection and promote healing. These products create a protective barrier over the wound and help reduce the risk of bacterial contamination.
3. Keep the Wound Moist:
Keep the wound moist by applying a sterile, non-adhesive dressing or a hydrogel dressing. Moist wound healing creates an optimal environment for cell growth and tissue repair, accelerating the healing process.
Avoid allowing the wound to dry out completely, as this can slow down healing and increase the risk of scarring.
4. Change Dressings Regularly:
Change dressings regularly according to healthcare provider's recommendations or whenever they become soiled or wet. Clean the wound gently before applying a new dressing to prevent infection and maintain a moist wound environment.
5. Protect the Wound:
Cover the wound with a clean, dry dressing or bandage to protect it from further injury and reduce the risk of infection. Use adhesive strips or tape to secure the dressing in place, ensuring that it does not constrict blood flow or cause discomfort.
Avoid exposing the wound to dirt, debris, or other contaminants, especially in outdoor or high-risk environments.
6. Practice Good Hygiene:
Wash your hands thoroughly with soap and water before and after providing wound care to prevent the spread of infection. Use disposable gloves when handling wounds, particularly if they are large, deep, or contaminated.
7. Avoid Scratching or Picking:
Encourage the person to avoid scratching, picking, or rubbing the wound, as this can introduce bacteria and delay healing. Keep fingernails short and clean to reduce the risk of infection.
8. Monitor for Signs of Infection:
Monitor the wound closely for signs of infection, such as increased redness, swelling, warmth, or drainage, or the development of pus. Other signs may include fever, chills, or worsening pain.
Seek medical attention if any signs of infection or complications develop, as prompt treatment is essential to prevent further complications.
9. Maintain a Healthy Lifestyle:
Encourage the person to maintain a healthy lifestyle by eating a balanced diet, staying hydrated, getting adequate rest, and avoiding smoking or excessive alcohol consumption. Good nutrition and overall health promote faster wound healing and reduce the risk of complications.
By following these preventive measures and promoting a healthy healing environment, you can help minimise the risk of infection and support the body's natural healing processes. However, if there are any concerns or signs of infection, it's crucial to seek medical attention promptly for further evaluation and treatment.
Choking Emergencies
Recognising signs of choking
Recognising the signs of choking is crucial for providing timely assistance to individuals experiencing this life-threatening emergency. Here are the common signs and symptoms of choking:
1. Difficulty Breathing:
The person may exhibit signs of respiratory distress, including gasping for air, wheezing, or making high-pitched noises while attempting to breathe.
2. Inability to Speak or Cough:
The person may be unable to speak or produce any sound due to the obstruction in the airway. They may also exhibit frantic gestures or grasp at their throat.
3. Bluish Skin or Lips (Cyanosis):
Lack of oxygen can cause the skin, lips, or nail beds to turn blue or purple, indicating a severe lack of oxygen in the bloodstream.
4. Clutching at Throat:
The person may instinctively reach for their throat with one or both hands, signalling that they are unable to breathe due to an obstruction.
5. Panic or Agitation:
The individual may appear anxious, panicked, or agitated, particularly if they are aware that they are choking and struggling to breathe.
6. Loss of Consciousness:
In severe cases of choking, the person may lose consciousness due to lack of oxygen. They may become limp or unresponsive, indicating a critical emergency.
7. Silent Choking:
Some individuals may experience choking without producing any sound, known as "silent choking." This is particularly common in cases where the airway is partially blocked, such as with a small object or food bolus.
8. Gagging or Drooling:
The person may exhibit signs of gagging, retching, or drooling, especially if the obstruction is causing discomfort or irritation in the throat.
9. Fainting or Collapsing:
In severe cases of choking, the individual may faint or collapse due to lack of oxygen. Loss of consciousness is a critical sign that immediate intervention is required.
10. Struggling or Agitated Behaviour:
The person may display signs of distress, such as clutching at their neck, attempting to cough forcefully, or appearing restless and agitated.
It's important to note that individuals experiencing choking may not always exhibit all of these signs, and symptoms can vary depending on the severity of the obstruction and the individual's response. However, any indication of choking should be treated as a medical emergency, and prompt action should be taken to clear the airway and restore normal breathing. If you suspect that someone is choking, it's crucial to intervene immediately and provide appropriate first aid, such as the Heimlich manoeuvre (abdominal thrusts) or back blows, to dislodge the obstruction and allow the person to breathe freely. Additionally, call emergency medical services (911 or your local emergency number) for further assistance if needed.
Performing the Heimlich manoeuvre (abdominal thrusts)
Performing the Heimlich manoeuvre, also known as abdominal thrusts, is a crucial skill for dislodging an obstructed airway in individuals who are choking. Follow these steps to perform the Heimlich manoeuvre effectively:
1. Assess the Situation:
Quickly assess the person's condition and determine if they are choking. Look for signs of choking, such as difficulty breathing, inability to speak or cough, and grasping at the throat.
Ask the person if they are choking and if they need assistance. If they are unable to respond or if they signal that they are choking, intervene immediately.
2. Stand Behind the Person:
Stand behind the person who is choking and position yourself slightly to the side.
Encourage the person to remain calm and reassure them that you will help them.
3. Wrap Your Arms Around the Person:
Reach your arms around the person's waist and make a fist with one hand. Place the thumb side of your fist against the person's abdomen, slightly above the navel and below the ribcage.
4. Perform Abdominal Thrusts:
Grasp your fist with your other hand and quickly press inward and upward with a quick, upward thrust into the abdomen.
Perform a series of rapid, upward thrusts, using enough force to dislodge the obstruction but being careful not to cause injury. Each thrust should be delivered with a quick, jerking motion.
5. Continue Thrusts Until Obstruction is Dislodged:
Continue performing abdominal thrusts until the obstruction is dislodged and the person is able to breathe, cough, or speak effectively.
If the person becomes unconscious, lower them gently to the ground and perform CPR (cardiopulmonary resuscitation) if necessary.
6. Seek Medical Help:
After the obstruction is cleared, encourage the person to seek medical attention, even if they appear to be breathing normally.
Monitor the person closely for any signs of complications or recurrence of choking.
7. If the Person is Unconscious:
If the person becomes unconscious, carefully lower them to the ground.
Call emergency medical services (911 or your local emergency number) immediately and begin CPR if trained to do so.
8. Special Considerations:
If the person is pregnant, obese, or has a large abdomen, wrap your arms around their chest and place the heel of one hand slightly above the navel and below the ribcage. Perform inward and upward thrusts with quick, firm pressure.
For infants under one year of age, perform chest thrusts instead of abdominal thrusts to avoid causing injury. Position the infant face down on your forearm and deliver five back blows between the shoulder blades followed by five chest thrusts using two fingers.
Remember to act quickly and decisively when performing the Heimlich manoeuvre, as timely intervention is essential for dislodging the obstruction and restoring normal breathing. If the person's condition does not improve or if they become unconscious, seek medical help immediately and be prepared to provide further assistance as needed.
Helping a conscious choking victim
If you encounter a conscious choking victim, it's essential to act quickly and effectively to dislodge the obstruction from their airway. Follow these steps to assist a conscious choking victim:
1. Assess the Situation:
Quickly assess the person's condition and determine if they are choking. Look for signs of choking, such as difficulty breathing, inability to speak or cough, and grasping at the throat.
Ask the person if they are choking and if they need assistance. If they are unable to respond or if they signal that they are choking, intervene immediately.
2. Encourage Coughing:
Initially, encourage the person to cough forcefully to try to dislodge the obstruction on their own. Coughing is the body's natural response to choking and may help expel the object from the airway.
3. Perform Back Blows:
If coughing is ineffective and the person is still choking, stand behind the person and deliver back blows to dislodge the obstruction.
Position yourself slightly to the side of the person and use the heel of your hand to deliver five sharp blows between the shoulder blades.
Each back blow should be firm and forceful but not so strong as to cause injury. The goal is to create enough force to dislodge the obstruction.
4. Perform Abdominal Thrusts (Heimlich Manoeuvre):
If back blows are unsuccessful in clearing the obstruction, move to perform abdominal thrusts (also known as the Heimlich manoeuvre).
Stand behind the person and wrap your arms around their waist. Make a fist with one hand and position it slightly above the navel and below the ribcage.
Grasp your fist with your other hand and deliver a quick, upward thrust into the abdomen with enough force to dislodge the obstruction.
Perform a series of rapid, upward thrusts until the obstruction is cleared and the person can breathe, cough, or speak effectively.
5. Continue Assisting Until Obstruction is Cleared:
Continue alternating between back blows and abdominal thrusts until the obstruction is cleared and the person can breathe normally.
If the person becomes unconscious, carefully lower them to the ground and begin CPR if necessary.
6. Seek Medical Help:
After the obstruction is cleared, encourage the person to seek medical attention, even if they appear to be breathing normally.
Monitor the person closely for any signs of complications or recurrence of choking.
7. Special Considerations:
If the person is pregnant, obese, or has a large abdomen, adjust the technique of abdominal thrusts to accommodate their size and anatomy.
If the person is an infant under one year of age, perform chest thrusts instead of abdominal thrusts. Position the infant face down on your forearm and deliver five back blows followed by five chest thrusts using two fingers.
Remember to remain calm and focused while assisting a choking victim, and act quickly to remove the obstruction from their airway. If the person's condition does not improve or if they become unconscious, seek medical help immediately and be prepared to provide further assistance as needed.
Medical Emergencies
Recognising signs and symptoms of common medical emergencies (e.g., heart attack, stroke, allergic reactions)
Recognising the signs and symptoms of common medical emergencies is crucial for prompt intervention and appropriate management. Here's a guide to recognising the signs and symptoms of some of the most prevalent medical emergencies:
1. Heart Attack (Myocardial Infarction):
Chest pain or discomfort, which may feel like pressure, squeezing, fullness, or pain in the center of the chest.
Pain or discomfort in other areas of the upper body, including the arms, back, neck, jaw, or stomach.
Shortness of breath, difficulty breathing, or feeling lightheaded.
Cold sweats, nausea, vomiting, or feeling faint.
Anxiety, restlessness, or a sense of impending doom.
Women may experience additional symptoms such as unusual fatigue, dizziness, or discomfort in the upper back, shoulders, or abdomen.
2. Stroke (Cerebrovascular Accident):
Sudden numbness or weakness, especially on one side of the body.
Sudden confusion, trouble speaking, or difficulty understanding speech.
Sudden trouble seeing in one or both eyes.
Sudden trouble walking, dizziness, loss of balance, or lack of coordination.
Sudden severe headache with no known cause.
3. Allergic Reactions (Anaphylaxis):
Itching, hives, or a rash over large areas of the body.
Swelling of the face, lips, tongue, throat, or other parts of the body.
Difficulty breathing, wheezing, or shortness of breath.
Rapid heartbeat, palpitations, or weak pulse.
Nausea, vomiting, abdominal pain, or diarrhoea.
Feeling of impending doom or anxiety.
4. Severe Bleeding (Haemorrhage):
Rapid, significant blood loss from a wound or injury.
Blood pooling under the skin or soaking through clothing.
Weakness, light-headedness, or fainting due to low blood pressure.
Rapid heartbeat or weak pulse.
Cold, clammy skin or pale complexion.
5. Seizures (Epileptic Seizures):
Uncontrollable jerking movements of the limbs or body.
Loss of consciousness or altered awareness.
Stiffening of muscles or rigidity.
Breathing difficulties, shallow breathing, or temporary cessation of breathing.
Loss of bladder or bowel control.
Confusion, disorientation, or fatigue after the seizure.
6. Diabetic Emergencies (Hypoglycaemia or Hyperglycaemia):
Hypoglycaemia (Low Blood Sugar):
Shakiness, trembling, or sweating.
Rapid heartbeat or palpitations.
Weakness, fatigue, or dizziness.
Confusion, irritability, or difficulty concentrating.
Blurred vision or headache.
Hyperglycaemia (High Blood Sugar):
Increased thirst and urination.
Fatigue, weakness, or lethargy.
Nausea, vomiting, or abdominal pain.
Rapid, deep breathing (Kussmaul breathing) or fruity breath odour.
Confusion, difficulty concentrating, or drowsiness.
7. Respiratory Emergencies (Asthma Attack, Pulmonary Embolism):
Asthma Attack:
Shortness of breath, wheezing, or coughing.
Chest tightness or pain.
Rapid breathing or difficulty exhaling.
Anxiety, restlessness, or panic.
Bluish lips or fingernails.
Pulmonary Embolism:
Sudden onset of shortness of breath.
Sharp chest pain that may worsen with deep breathing or coughing.
Rapid heartbeat or palpitations.
Coughing up blood.
Sweating, light-headedness, or fainting.
Recognising these signs and symptoms of common medical emergencies allows for timely intervention and can help improve outcomes for individuals experiencing these conditions. If you or someone else experiences any of these symptoms, seek immediate medical attention by calling emergency services (911 or your local emergency number) or visiting the nearest emergency department. Early recognition and prompt treatment are essential in medical emergencies to prevent complications and save lives.
Providing appropriate first aid while awaiting professional help
Providing appropriate first aid while awaiting professional help can significantly improve outcomes in medical emergencies. Here's a guide on providing first aid for some common medical emergencies:
1. Heart Attack (Myocardial Infarction):
Help the person sit or lie down in a comfortable position.
Loosen tight clothing and reassure them.
If the person is conscious and not allergic, give them aspirin to chew (if available) to help reduce blood clotting.
Monitor the person's vital signs and be prepared to perform CPR if necessary.
Stay with the person and reassure them until emergency medical services arrive.
2. Stroke (Cerebrovascular Accident):
Remember the acronym FAST (Face, Arms, Speech, Time) to recognise signs of stroke: Facial drooping, Arm weakness, Speech difficulties, Time to call emergency services.
Help the person sit or lie down in a comfortable position and keep them calm.
Do not give the person anything to eat or drink.
Note the time when symptoms began, as this information is important for treatment decisions.
Be prepared to perform CPR if the person becomes unresponsive.
3. Allergic Reactions (Anaphylaxis):
Help the person sit or lie down in a comfortable position and reassure them.
If the person has an epinephrine auto-injector (such as an EpiPen), assist them in using it according to the manufacturer's instructions.
Monitor the person's breathing and vital signs.
Be prepared to perform CPR if the person becomes unresponsive.
If the person's condition worsens or if they have difficulty breathing, call emergency medical services immediately.
4. Severe Bleeding (Haemorrhage):
Apply direct pressure to the wound using a clean cloth or bandage to control bleeding.
Elevate the injured limb above the level of the heart, if possible, to reduce blood flow to the area.
Apply a pressure bandage or tourniquet (if necessary and as a last resort) to stop bleeding.
Monitor the person's vital signs and be prepared to perform CPR if necessary.
Do not remove any objects embedded in the wound.
5. Seizures (Epileptic Seizures):
Protect the person from injury by moving nearby objects and cushioning their head.
Do not restrain the person or put anything in their mouth.
Time the duration of the seizure and stay with the person until it ends.
Once the seizure is over, help the person into a recovery position and reassure them.
If the seizure lasts longer than five minutes, call emergency medical services immediately.
6. Diabetic Emergencies (Hypoglycaemia or Hyperglycaemia):
For hypoglycaemia (low blood sugar), give the person a fast-acting carbohydrate such as glucose tablets, fruit juice, or candy (if conscious and able to swallow).
For hyperglycaemia (high blood sugar), encourage the person to drink water and avoid sugary foods or drinks.
Monitor the person's blood sugar levels if possible and be prepared to administer insulin or other medications as directed.
If the person becomes unresponsive or experiences severe symptoms, call emergency medical services immediately.
7. Respiratory Emergencies (Asthma Attack, Pulmonary Embolism):
Help the person sit upright and lean forward to ease breathing.
Assist the person in using their prescribed inhaler or nebuliser for asthma attacks.
Stay calm and reassure the person while monitoring their breathing and vital signs.
If the person becomes unresponsive, call emergency medical services immediately and be prepared to perform CPR.
In all medical emergencies, it's essential to stay calm, provide reassurance to the person in distress, and act quickly to obtain professional medical assistance. Remember to prioritise your own safety and only provide first aid within your level of training and comfort. If in doubt, call emergency medical services and follow their instructions until help arrives.
Environmental Emergencies
Heat-related illnesses (heat exhaustion, heatstroke)
Heat-related illnesses, including heat exhaustion and heatstroke, can occur when the body's ability to regulate temperature is overwhelmed by environmental conditions such as high temperatures and humidity. Recognising the signs and symptoms of these conditions and providing prompt first aid is essential for preventing serious complications. Here's how to recognise and respond to heat-related illnesses:
1. Heat Exhaustion:
Signs and Symptoms:
Heavy sweating
Weakness or fatigue
Dizziness or light-headedness
Nausea or vomiting
Headache
Muscle cramps
Cool, moist skin
Fast, weak pulse
First Aid:
Move the person to a cooler, shaded area.
Have them lie down and elevate their legs to improve circulation.
Remove any tight or unnecessary clothing.
Cool the person down by applying cool, wet clothes or towels to their skin and fanning them.
Offer sips of water or a sports drink containing electrolytes to help rehydrate.
Monitor the person's condition and seek medical attention if symptoms worsen or do not improve within 30 minutes.
2. Heatstroke:
Signs and Symptoms:
High body temperature (above 103°F or 39.4°C)
Hot, dry skin (lack of sweating)
Rapid, strong pulse
Throbbing headache
Dizziness or confusion
Nausea or vomiting
Rapid, shallow breathing
Loss of consciousness
First Aid:
Call emergency medical services immediately (911 or your local emergency number).
Move the person to a cooler, shaded area and remove any unnecessary clothing.
Cool the person rapidly by immersing them in a cool bath or shower, or applying cool water-soaked towels to their skin and fanning them.
If immersion is not possible, apply ice packs or cold compresses to the person's armpits, groin, neck, and back to help lower their body temperature.
Monitor the person's temperature and continue cooling efforts until emergency help arrives.
Do not give the person anything to drink if they are unconscious or unable to swallow, as this may cause choking.
Prevention Tips:
Stay hydrated by drinking plenty of fluids, especially water, before, during, and after outdoor activities.
Avoid strenuous activity during the hottest parts of the day (usually between 10 a.m. and 4 p.m.).
Wear lightweight, loose-fitting clothing and a wide-brimmed hat to protect against the sun.
Take frequent breaks in shaded or air-conditioned areas to cool down.
Be aware of signs of heat-related illness in yourself and others, and take action promptly if symptoms occur.
By recognising the signs and symptoms of heat-related illnesses and taking appropriate first aid measures, you can help prevent serious complications and promote recovery. However, if someone shows signs of heatstroke, it's crucial to seek emergency medical help immediately, as heatstroke can be life-threatening if not treated promptly.
Cold-related illnesses (hypothermia, frostbite)
Cold-related illnesses, such as hypothermia and frostbite, occur when the body loses heat faster than it can produce it, leading to a dangerous drop in body temperature. Recognising the signs and symptoms of these conditions and providing prompt first aid is crucial for preventing further complications. Here's how to recognise and respond to cold-related illnesses:
1. Hypothermia:
Signs and Symptoms:
Shivering (in mild cases)
Cold, pale skin
Slurred speech or mumbling
Confusion or difficulty thinking clearly
Fatigue or weakness
Slow, shallow breathing
Weak pulse
Loss of coordination
Unconsciousness (in severe cases)
First Aid:
Move the person to a warmer area as soon as possible.
Remove any wet clothing and replace with dry clothing or blankets.
Wrap the person in blankets or warm clothing, covering their head and neck.
Provide warm, non-alcoholic beverages if the person is conscious and able to swallow.
Use your own body heat to help warm the person, such as by hugging them or sharing body heat under blankets.
Monitor the person's vital signs and seek medical attention immediately, as hypothermia can be life-threatening.
2. Frostbite:
Signs and Symptoms:
Cold, numb, or tingling sensation in affected areas (such as fingers, toes, nose, or ears)
Pale, white, or greyish skin colour
Hard or waxy appearance of the skin
Loss of sensation in the affected area
Swelling or blistering (in severe cases)
First Aid:
Move the person to a warmer area and protect them from further cold exposure.
Remove any wet clothing and gently pat the affected area dry.
Immerse the affected area in warm (not hot) water or apply warm compresses to help gradually rewarm the tissue.
Avoid rubbing or massaging the affected area, as this can cause further damage.
Elevate the affected area and keep it elevated to reduce swelling.
If blisters develop, do not puncture them, as this can increase the risk of infection.
Cover the affected area with clean, dry dressings or sterile gauze.
Seek medical attention promptly, especially for severe frostbite or if the person is showing signs of hypothermia.
Prevention Tips:
Dress in layers and wear warm, insulated clothing when going out in cold weather.
Protect exposed skin by wearing hats, gloves, scarves, and waterproof boots.
Stay dry and avoid prolonged exposure to wet or damp conditions.
Limit time spent outdoors in extreme cold weather, especially during periods of high wind or low temperatures.
Be aware of signs of cold-related illnesses in yourself and others, and take action promptly if symptoms occur.
By recognising the signs and symptoms of cold-related illnesses and taking appropriate first aid measures, you can help prevent further complications and promote recovery. However, if someone shows signs of severe hypothermia or frostbite, it's crucial to seek emergency medical help immediately, as these conditions require prompt medical treatment to prevent long-term damage or complications.
First aid for environmental emergencies
Environmental emergencies encompass a wide range of situations, including heat-related illnesses, cold-related illnesses, natural disasters, and outdoor accidents. Here's a comprehensive guide on providing first aid for various environmental emergencies:
1. Heat-Related Illnesses:
Heat Exhaustion:
Move the person to a cooler, shaded area.
Have them lie down and elevate their legs.
Remove tight or unnecessary clothing.
Apply cool, wet cloths to the skin and fan the person to promote cooling.
Offer sips of water or a sports drink containing electrolytes.
Monitor the person's condition and seek medical attention if symptoms worsen.
Heatstroke:
Call emergency medical services immediately (911 or your local emergency number).
Move the person to a cooler area and remove unnecessary clothing.
Cool the person rapidly by immersion in cool water or applying cold packs to the armpits, groin, neck, and back.
Monitor the person's temperature and continue cooling efforts until help arrives.
2. Cold-Related Illnesses:
Hypothermia:
Move the person to a warmer area and remove wet clothing.
Wrap them in blankets or warm clothing and provide warm, non-alcoholic beverages.
Use your body heat to help warm the person.
Seek medical attention immediately, as hypothermia can be life-threatening.
Frostbite:
Move the person to a warmer area and protect them from further cold exposure.
Gently pat the affected area dry and apply warm compresses to help rewarm the tissue.
Avoid rubbing or massaging the affected area.
Cover the area with dry dressings and seek medical attention promptly.
3. Natural Disasters:
Earthquakes:
Drop to the ground, take cover under a sturdy piece of furniture, and hold on until the shaking stops.
If outdoors, move to an open area away from buildings, trees, streetlights, and utility wires.
After the shaking stops, check for injuries and provide first aid as needed.
Hurricanes/Tornadoes:
Seek shelter in a sturdy building, away from windows and doors.
If caught outdoors, seek shelter in a low-lying area or ditch and cover your head.
After the storm passes, check for injuries and provide first aid as needed.
Floods:
Evacuate to higher ground if flooding is imminent.
Avoid walking or driving through floodwaters.
After the floodwaters recede, be cautious of potential hazards such as debris, downed power lines, and contaminated water.
4. Outdoor Accidents:
Hiking/Camping Injuries:
Assess the person for injuries and provide first aid as needed.
If the injury is severe or if evacuation is necessary, call emergency services for assistance.
Animal Bites/Stings:
Wash the affected area with soap and water.
Apply a cold compress to reduce pain and swelling.
Seek medical attention if the bite or sting is from a venomous animal or if the person has a severe allergic reaction.
5. Poisonous Plant Exposure:
Wash the affected area with soap and water to remove any plant oils.
Apply calamine lotion or hydrocortisone cream to relieve itching.
Seek medical attention if the rash is severe or if blisters develop.
In any environmental emergency, it's important to stay calm, assess the situation, and provide appropriate first aid while awaiting professional help. Remember to prioritise your safety and the safety of others, and be prepared to adapt your response based on the specific circumstances of the emergency.
Poisons and Toxic Substances
Identifying signs of poisoning
Identifying signs of poisoning is crucial for providing timely assistance and seeking appropriate medical treatment. Here are common signs and symptoms of poisoning:
1. Nausea and Vomiting: Persistent nausea or vomiting, especially if sudden or severe, may indicate poisoning.
2. Abdominal Pain: Sharp or cramping abdominal pain, particularly if accompanied by diarrhoea, may be a sign of poisoning.
3. Difficulty Breathing: Difficulty breathing, shortness of breath, or wheezing can occur if poisonous substances are inhaled or ingested.
4. Altered Mental Status: Confusion, disorientation, dizziness, or difficulty staying awake may indicate poisoning affecting the central nervous system.
5. Unexplained Fatigue: Sudden onset of fatigue, weakness, or lethargy without an obvious cause could be a sign of poisoning.
6. Skin Changes: Rash, itching, redness, or irritation of the skin may occur with exposure to certain toxic substances.
7. Changes in Pupils: Dilated or constricted pupils that are not due to changes in lighting may indicate poisoning.
8. Changes in Heart Rate: Rapid or irregular heartbeat, palpitations, or chest pain may occur with certain poisonings.
9. Seizures: Seizures or convulsions may occur with severe poisonings affecting the central nervous system.
10. Unusual Odors: Smelling unusual or strong odours, such as chemical smells, may indicate exposure to toxic substances.
11. Burns or Irritation: Burns, blisters, redness, or irritation on the skin or mucous membranes may occur with exposure to corrosive or caustic substances.
12. Changes in Urine Colour: Dark urine, blood in the urine, or changes in urine colour may be a sign of poisoning affecting the kidneys or urinary tract.
13. Changes in Vision: Blurred vision, double vision, or changes in vision may occur with certain poisonings.
14. Unexplained Bruising or Bleeding: Unexplained bruising, bleeding from the nose or gums, or blood in vomit or stool may indicate poisoning affecting blood clotting or the liver.
15. Unconsciousness: Loss of consciousness or coma may occur with severe poisonings affecting the central nervous system or respiratory system.
If you suspect someone has been poisoned, it's essential to act quickly:
Call emergency services (your local emergency number) immediately.
Provide as much information as possible about the suspected poison, including the type, amount, and time of exposure.
Follow any instructions given by emergency services operators until help arrives.
Do not attempt to induce vomiting or give the person anything to eat or drink unless instructed to do so by emergency services or a poison control center.
Prompt identification and response to signs of poisoning can help prevent serious complications and save lives.
First aid for ingested, inhaled, or topical poisons
Providing first aid for ingested, inhaled, or topical poisons involves specific steps tailored to the type of poisoning and the nature of the toxic substance involved. Here's a guide on how to respond to each type of poisoning:
1. Ingested Poisons:
Signs and Symptoms:
Nausea, vomiting, or diarrhoea
Abdominal pain or cramping
Difficulty breathing or swallowing
Dizziness, drowsiness, or confusion
Unconsciousness or seizures
First Aid:
Call emergency medical services immediately (911 or your local emergency number).
Do not induce vomiting unless instructed to do so by emergency services or a poison control center. In some cases, vomiting can worsen the situation.
If the person is conscious and able to swallow, give them small sips of water to dilute the poison and prevent dehydration.
Do not give the person anything to eat or drink that may increase absorption of the poison, such as milk or activated charcoal, unless instructed to do so by emergency services or a poison control center.
If the person vomits, collect a sample of the vomit to show to medical professionals, if possible.
Monitor the person's vital signs and provide reassurance while waiting for help to arrive.
2. Inhaled Poisons:
Signs and Symptoms:
Difficulty breathing or shortness of breath
Coughing, wheezing, or chest tightness
Irritation of the eyes, nose, or throat
Dizziness, headache, or confusion
Nausea, vomiting, or diarrhoea
First Aid:
Move the person to a well-ventilated area with fresh air immediately.
If the person is unconscious, check for breathing and pulse. Perform CPR if necessary.
If the person is conscious, encourage them to breathe slowly and deeply.
Remove any contaminated clothing and wash exposed skin with soap and water.
Seek medical attention promptly, especially if the person is having difficulty breathing or if symptoms worsen.
3. Topical Poisons (Skin Exposure):
Signs and Symptoms:
Skin redness, irritation, or burns
Itching, rash, or hives
Blisters or swelling
Pain or discomfort at the site of exposure
First Aid:
Remove any contaminated clothing and jewellery.
Rinse the affected area with lukewarm water for at least 15 minutes to remove the poison.
Do not use soap or other chemicals unless instructed to do so by emergency services or a poison control center.
Cover the affected area with a clean, dry dressing or bandage.
Seek medical attention if the skin appears burned, blistered, or irritated, or if the person is experiencing severe pain or discomfort.
In all cases of poisoning, it's essential to seek emergency medical help immediately. Provide as much information as possible about the type of poison, the amount ingested or exposed to, and the person's symptoms. Follow any instructions given by emergency services or poison control centres until help arrives. Prompt action can help minimise the effects of poisoning and prevent serious complications.
When to contact Poison Control or emergency services
Contact Poison Control or emergency services immediately in the following situations:
1. Signs of Poisoning: If someone exhibits signs or symptoms of poisoning, such as nausea, vomiting, difficulty breathing, confusion, seizures, or unconsciousness.
2. Suspected Ingestion of Poison: If someone has ingested a potentially toxic substance, whether accidentally or intentionally.
3. Inhaled Poisons: If someone has been exposed to toxic fumes, gases, or chemicals and is experiencing symptoms such as difficulty breathing, coughing, chest pain, or dizziness.
4. Topical Exposure to Poisons: If someone has come into contact with a poisonous substance on their skin, eyes, or mucous membranes, and is experiencing symptoms such as skin irritation, burns, or swelling.
5. Ingestion of Unknown Substances: If someone, especially a child, has ingested an unknown substance or medication, as it may be toxic.
6. Suspected Overdose: If someone has taken an overdose of medication, whether intentionally or accidentally.
7. Unconsciousness or Severe Symptoms: If someone is unconscious or experiencing severe symptoms, such as difficulty breathing, seizures, or loss of consciousness.
8. Medical Emergencies: If someone is in a life-threatening condition, regardless of the cause, including symptoms such as chest pain, difficulty breathing, severe allergic reactions, or severe injuries.
9. Anytime You're Unsure: If you're unsure whether a situation constitutes a medical emergency or requires assistance, it's better to err on the side of caution and contact emergency services or Poison Control for guidance.
In the event of a poisoning or medical emergency, always prioritise the safety and well-being of the affected individual. Do not hesitate to seek help immediately, as prompt action can help prevent serious complications and save lives. Provide as much information as possible about the situation to emergency responders or Poison Control, and follow any instructions given until help arrives.
Psychological First Aid
Understanding psychological reactions to trauma
Understanding psychological reactions to trauma is essential for providing effective psychological first aid (PFA) and support to individuals who have experienced traumatic events. Here are some common psychological reactions to trauma:
1. Emotional Reactions:
Shock: A sense of numbness, disbelief, or feeling disconnected from reality.
Fear: An overwhelming sense of anxiety, terror, or dread related to the traumatic event.
Anger: Feelings of frustration, irritability, or hostility, often directed toward oneself or others.
Guilt: Blaming oneself for the traumatic event or feeling responsible for its occurrence.
Sadness: Profound feelings of grief, sorrow, or despair over losses associated with the trauma.
Helplessness: A sense of powerlessness or inability to control one's circumstances.
Shame: Feelings of embarrassment, humiliation, or self-blame related to the trauma.
2. Cognitive Reactions:
Intrusive Thoughts: Unwanted, distressing thoughts, memories, or images of the traumatic event that intrude into consciousness.
Flashbacks: Vivid and distressing recollections of the traumatic event that feel as if they are happening again.
Memory Disturbances: Difficulty remembering details of the traumatic event or gaps in memory.
Confusion: Difficulty concentrating, making decisions, or processing information.
Denial: Unwillingness or inability to accept the reality of the traumatic event.
Hypervigilance: Heightened alertness, scanning the environment for potential threats or danger.
Dissociation: Feeling disconnected from oneself, one's thoughts, feelings, or surroundings as a way to cope with overwhelming emotions.
3. Physical Reactions:
Sleep Disturbances: Difficulty falling asleep, staying asleep, or experiencing nightmares related to the trauma.
Fatigue: Physical exhaustion or lack of energy, often due to heightened stress levels.
Appetite Changes: Loss of appetite or overeating as a way to cope with emotional distress.
Muscle Tension: Tightness or stiffness in muscles, often accompanied by headaches or other physical discomfort.
4. Behavioural Reactions:
Avoidance: Avoiding reminders of the traumatic event, such as places, people, activities, or thoughts associated with the trauma.
Withdrawal: Withdrawing from social interactions, hobbies, or activities once enjoyed.
Increased Substance Use: Turning to alcohol, drugs, or other substances as a way to cope with emotional pain.
Risk-Taking Behaviors: Engaging in risky or impulsive behaviors as a way to numb emotions or regain a sense of control.
Aggression: Acting out in aggressive or violent ways toward oneself or others as a way to cope with anger or frustration.
It's important to note that everyone responds to trauma differently, and reactions can vary widely based on individual factors such as past experiences, coping skills, and support systems. Providing psychological first aid involves validating the person's feelings, offering practical support, and connecting them with appropriate resources for further assistance. Encouraging self-care, active listening, and promoting a sense of safety and empowerment are also essential components of psychological first aid in the aftermath of trauma.
Providing emotional support and reassurance
Providing emotional support and reassurance is a crucial aspect of psychological first aid, especially in the aftermath of trauma or crisis. Here are some strategies for offering emotional support and reassurance:
1. Active Listening:
Listen attentively and without judgment to the person's thoughts, feelings, and concerns.
Validate their emotions by acknowledging their experiences and expressing empathy.
Use reflective listening techniques, such as paraphrasing or summarising what they've said, to demonstrate understanding.
2. Offer Reassurance:
Provide reassurance that their reactions are normal responses to a traumatic event and that they are not alone in their experiences.
Remind them that it's okay to feel overwhelmed, and reassure them that they are safe in the present moment.
Offer hope by emphasising that healing is possible and that they have the strength to cope with their feelings and recover from the trauma.
3. Provide Comfort:
Offer physical comfort, such as a hug, hand-holding, or sitting close to the person if appropriate and if it's welcomed.
Use soothing gestures, such as a gentle touch on the shoulder or a reassuring smile, to convey warmth and support.
4. Encourage Self-Expression:
Encourage the person to express their emotions in whatever way feels comfortable to them, whether through talking, writing, drawing, or other creative outlets.
Validate their feelings and let them know that it's okay to cry, laugh, or express anger as part of the healing process.
5. Foster Connection:
Help the person feel connected to their support network, such as family, friends, or community resources.
Offer to accompany them to support groups, counseling sessions, or other activities where they can connect with others who have experienced similar challenges.
6. Provide Information:
Offer information about available resources and support services, such as crisis hotlines, counseling services, or support groups, and assist them in accessing these resources if needed.
Educate them about common reactions to trauma and coping strategies that may be helpful in managing their emotions and promoting resilience.
7. Follow-Up:
Check in with the person regularly to see how they're doing and offer ongoing support as needed.
Be patient and understanding, recognising that healing from trauma takes time, and recovery is a gradual process.
8. Practice Self-Care:
Take care of yourself so that you can be emotionally available and supportive to others.
Seek support from trusted friends, family members, or mental health professionals if you're feeling overwhelmed by the emotional demands of providing support to others.
Remember that providing emotional support and reassurance involves being present, compassionate, and respectful of the person's feelings and boundaries. Your supportive presence can make a significant difference in helping someone navigate the challenges of coping with trauma and finding a path toward healing and recovery.
Referring individuals to appropriate resources
Referring individuals to appropriate resources is an essential part of providing comprehensive support, especially in the aftermath of trauma or during times of crisis. Here's how to effectively refer individuals to appropriate resources:
1. Assess the Person's Needs:
Take the time to understand the person's current situation, their concerns, and their preferences for support.
Ask open-ended questions to explore their needs and identify any specific challenges they may be facing.
2. Provide Information about Available Resources:
Offer information about a variety of resources that may be relevant to their needs, including:
Crisis hotlines: Provide immediate support and guidance for individuals in crisis.
Counseling services: Offer therapeutic support and coping strategies for managing emotional distress.
Support groups: Provide opportunities for individuals to connect with others who have experienced similar challenges and share their experiences.
Community organisations: Offer practical assistance, such as food assistance, housing support, or legal advocacy.
Online resources: Provide access to reputable websites, articles, or forums where individuals can find information and support.
3. Tailor Recommendations to Individual Preferences:
Take into account the person's preferences, cultural background, and unique needs when making recommendations.
Offer a range of options and let the person decide which resources they feel most comfortable accessing.
4. Assist with Accessing Resources:
Help the person navigate the process of accessing resources by providing contact information, website links, or directions for accessing services.
Offer to make phone calls or accompany the person to appointments if they need additional support.
5. Follow-Up and Check-In:
Follow up with the person to see if they were able to access the recommended resources and if they found them helpful.
Offer ongoing support and encouragement, and be available to provide further assistance or referrals if needed.
6. Maintain Confidentiality and Respect Privacy:
Respect the person's privacy and confidentiality when discussing their needs and accessing resources.
Obtain consent before sharing any personal information with third parties, and reassure the person that their information will be kept confidential.
7. Stay Informed About Available Resources:
Stay updated on available resources in your community, including new programs or services that may be relevant to the needs of individuals seeking support.
Establish relationships with local service providers and organisations to facilitate referrals and ensure that individuals receive appropriate care.
By effectively referring individuals to appropriate resources, you can help them access the support they need to cope with trauma, navigate challenges, and promote their overall well-being. Your support and guidance can make a meaningful difference in helping individuals find the help and resources they need to heal and thrive.
Paediatric First Aid
Unique considerations for providing first aid to children
When providing first aid to children, there are several unique considerations to keep in mind due to their smaller size, developmental differences, and specific medical needs. Here are some key considerations for paediatric first aid:
1. Size and Anatomy:
Children have smaller bodies and anatomical differences compared to adults. Adjustments may be needed when performing first aid procedures such as CPR, bandaging, or administering medications.
2. Developmental Stage:
Consider the child's age and developmental stage when communicating with them and assessing their condition. Younger children may not be able to express their symptoms or understand instructions as well as older children.
3. Psychological Approach:
Children may feel scared, anxious, or confused during medical emergencies. Offer reassurance, speak calmly and gently, and use age-appropriate language to explain what is happening and what will be done to help them.
4. Emotional Support:
Provide comfort and emotional support to both the child and their caregivers. Be attentive to their needs and feelings, and offer empathy and understanding during stressful situations.
5. Parental Involvement:
Involve parents or caregivers in the first aid process whenever possible. They can provide valuable information about the child's medical history, allergies, and medications, and they may also offer emotional support to the child.
6. Adaptations for Infants:
Infants have unique needs and vulnerabilities. Be mindful of their delicate airways, neck support, and susceptibility to dehydration and hypothermia. Use appropriate techniques for holding, positioning, and supporting the infant's head and neck during first aid procedures.
7. Recognition of Paediatric Emergencies:
Be familiar with common paediatric emergencies, such as choking, allergic reactions, febrile seizures, and respiratory distress, and know how to recognise and respond to them promptly.
8. Dosing and Medication Administration:
Pay careful attention to medication dosages and administration methods for children, as they are based on weight and age. Use paediatric-specific formulations and dosing devices, and ensure accurate calculation and administration of medications.
9. Child-Friendly Supplies:
Have child-friendly first aid supplies on hand, including smaller bandages, paediatric-sized oxygen masks, thermometers, and non-toxic wound care products.
10. Prevention and Education:
Emphasise the importance of child safety and injury prevention to parents and caregivers. Educate them about common hazards and preventive measures to keep children safe at home, school, and in the community.
11. Training and Certification:
Obtain specialised training in paediatric first aid and CPR to learn age-appropriate techniques and best practices for caring for children in emergency situations. Maintain certification through regular refresher courses and updates.
By considering these unique factors and tailoring your approach to the specific needs of children, you can provide effective and compassionate first aid care to help ensure the well-being and safety of paediatric patients.
Common childhood emergencies (e.g., febrile seizures, choking)
Common childhood emergencies can vary based on age, developmental stage, and environmental factors. Here are some of the most common paediatric emergencies:
1. Febrile Seizures:
Febrile seizures are convulsions that can occur in young children during a fever, usually between the ages of 6 months and 5 years. They typically last for a few minutes and are generally harmless, although they can be frightening for parents to witness.
First Aid:
Lay the child on their side on a soft surface to prevent injury. Remove any nearby objects that could cause harm. Do not restrain the child or try to stop the seizure. After the seizure stops, gently roll the child onto their back and monitor their breathing. Seek medical attention if it's the child's first febrile seizure, if the seizure lasts longer than 5 minutes, or if the child has difficulty breathing or turns blue.
2. Choking:
Choking occurs when a foreign object becomes lodged in the throat or windpipe, blocking airflow. Young children, especially those under the age of 4, are at higher risk of choking due to their tendency to put objects in their mouths.
First Aid:
Perform the Heimlich manoeuvre (abdominal thrusts) if the child is conscious and choking. If the child is unconscious, perform CPR with chest compressions and rescue breaths. If the child is able to cough forcefully or breathe, encourage them to continue coughing to expel the object. Seek medical attention if the object cannot be dislodged or if the child becomes unconscious.
3. Allergic Reactions:
Allergic reactions can range from mild symptoms, such as hives or itching, to severe symptoms, such as difficulty breathing, swelling of the face or throat, and anaphylaxis. Common triggers include foods, insect stings, medications, and latex.
First Aid:
Administer epinephrine (if available) for severe allergic reactions and call emergency services immediately. If the child has a known severe allergy, use an epinephrine auto-injector as prescribed. For milder reactions, administer antihistamines if appropriate and monitor the child closely for signs of worsening symptoms.
4. Asthma Attacks:
Asthma attacks can occur when the airways become inflamed and narrowed, leading to difficulty breathing, wheezing, coughing, and chest tightness. Asthma attacks can be triggered by allergens, respiratory infections, exercise, or exposure to irritants.
First Aid:
Help the child use their prescribed inhaler or nebuliser medication. Encourage them to sit upright and remain calm. If the child's symptoms do not improve or worsen, seek medical attention immediately.
5. Burns:
Burns can result from exposure to heat, chemicals, electricity, or friction. Children are particularly vulnerable to scald burns from hot liquids and steam, as well as contact burns from hot surfaces.
First Aid:
Remove the child from the source of the burn and cool the affected area with cool running water for at least 10-20 minutes. Remove clothing or jewellery from the burned area unless it is stuck to the skin. Cover the burn with a clean, dry dressing and seek medical attention for severe burns or burns involving the face, hands, feet, or genitalia.
6. Poisoning:
Poisoning can occur from ingesting, inhaling, or coming into contact with toxic substances, including household cleaners, medications, plants, and chemicals.
First Aid:
Call Poison Control or emergency services immediately. Follow their instructions for managing the specific type of poisoning. Do not induce vomiting unless instructed to do so by Poison Control or emergency services.
7. Head Injuries:
Head injuries can range from minor bumps and bruises to more serious traumatic brain injuries (TBIs) such as concussions or skull fractures. Falls and sports-related injuries are common causes of head injuries in children.
First Aid:
Assess the child for signs of concussion or other head injury, such as loss of consciousness, vomiting, confusion, or behavioural changes. Apply ice to reduce swelling and seek medical attention for any head injury that results in loss of consciousness, persistent vomiting, or changes in behaviour or responsiveness.
8. Near Drowning:
Near drowning occurs when a child survives a drowning incident but experiences respiratory distress or other complications afterward. It can happen in any body of water, including pools, bathtubs, or natural bodies of water.
First Aid:
Remove the child from the water and ensure their airway is clear. Perform CPR if the child is unconscious and not breathing. Seek immediate medical attention, even if the child appears to be breathing normally, as secondary drowning can occur hours after the incident.
It's essential for parents, caregivers, and anyone who spends time with children to be familiar with these common paediatric emergencies and know how to respond effectively in case of an emergency. Prompt action and appropriate first aid can help prevent further injury or complications and save lives.
Performing CPR and other interventions on infants and children
Performing CPR (Cardiopulmonary Resuscitation) and other interventions on infants and children requires special techniques and considerations due to their smaller size and unique physiology. Here's a step-by-step guide on how to perform CPR and other interventions on infants (under 1 year old) and children (1 year old to puberty):
Performing CPR on Infants (Under 1 Year Old):
1. Check Responsiveness: Gently tap the infant's foot and shout their name to check for responsiveness. Look for any signs of movement or responsiveness.
2. Call for Help: If the infant is unresponsive, immediately call emergency services (911 or your local emergency number).
3. Open the Airway: Place the infant on their back on a firm surface. Tilt their head back slightly by placing one hand on their forehead and gently lifting the chin with two fingers of the other hand.
4. Check Breathing: Look, listen, and feel for signs of normal breathing for up to 10 seconds. Look for chest rise and fall, listen for breath sounds, and feel for airflow against your cheek.
5. Begin Chest Compressions: If the infant is not breathing normally, begin CPR by delivering chest compressions. Use two fingers (not the palm) to compress the chest about 1.5 inches (about 1/3 of the depth of the chest). Perform 30 chest compressions at a rate of about 100-120 compressions per minute.
6. Give Rescue Breaths: After 30 compressions, give two rescue breaths. Cover the infant's mouth and nose with your mouth and give gentle puffs of air for about 1 second each, watching for chest rise.
7. Continue CPR: Continue cycles of 30 chest compressions followed by two rescue breaths until help arrives or the infant starts breathing normally.
Performing CPR on Children (1 Year Old to Puberty):
1. Check Responsiveness: Tap the child's shoulder and shout their name to check for responsiveness. Look for any signs of movement or responsiveness.
2. Call for Help: If the child is unresponsive, immediately call emergency services (911 or your local emergency number).
3. Open the Airway: Place the child on their back on a firm surface. Tilt their head back slightly by lifting the chin with two fingers.
4. Check Breathing: Look, listen, and feel for signs of normal breathing for up to 10 seconds. Look for chest rise and fall, listen for breath sounds, and feel for airflow against your cheek.
5. Begin Chest Compressions: If the child is not breathing normally, begin CPR by delivering chest compressions. Use the heel of one hand to compress the chest about 2 inches (about 1/3 of the depth of the chest). Perform 30 chest compressions at a rate of about 100-120 compressions per minute.
6. Give Rescue Breaths: After 30 compressions, give two rescue breaths. Pinch the child's nose closed, cover their mouth with your mouth, and give gentle breaths for about 1 second each, watching for chest rise.
7. Continue CPR: Continue cycles of 30 chest compressions followed by two rescue breaths until help arrives or the child starts breathing normally.
Additional Interventions:
If the infant or child is choking, perform abdominal thrusts (the Heimlich manoeuvre) if they are conscious and unable to breathe or cough effectively.
If an AED (Automated External Defibrillator) is available, use it according to the manufacturer's instructions after delivering CPR cycles.
Remember to reassess the infant or child's condition frequently and adjust your interventions accordingly. Providing prompt and effective CPR can significantly improve the chances of survival for infants and children experiencing cardiac arrest or respiratory distress.
First Aid Kits and Emergency Preparedness
Essentials for a home first aid kit
Creating a well-stocked home first aid kit is essential for handling minor injuries, illnesses, and emergencies that may occur in and around the home. Here's a list of essentials for a home first aid kit:
1. Adhesive Bandages: Various sizes and shapes to cover minor cuts, scrapes, and blisters.
2. Sterile Gauze Pads: Use for covering larger wounds or as a primary dressing for more severe injuries.
3. Adhesive Tape: Secure gauze pads and bandages in place.
4. Antiseptic Wipes or Solution: Clean wounds and prevent infection.
5. Antibiotic Ointment: Apply to minor cuts and scrapes to prevent infection.
6. Hydrogen Peroxide or Rubbing Alcohol: Use as a disinfectant for cleaning wounds.
7. Tweezers: For removing splinters, ticks, or other foreign objects from the skin.
8. Scissors: Use for cutting adhesive tape, gauze, and clothing in case of injury.
9. Thermometer: Digital thermometers are easy to use and can help monitor fevers.
10. Non-Latex Gloves: Protect against contamination and infection when providing first aid.
11. Instant Cold Packs: Use to reduce swelling and relieve pain for minor injuries.
12. Instant Heat Packs: Provide warmth for muscle strains, cramps, or minor aches and pains.
13. Sterile Eyewash Solution: Rinse eyes to flush out irritants or contaminants.
14. CPR Mask or Face Shield: Use for providing CPR safely in case of cardiac arrest.
15. Emergency Blanket: Provide warmth and protection from the elements in case of exposure to cold weather.
16. First Aid Manual: Contains instructions and guidance for providing first aid in various situations.
17. Pain Relievers: Include over-the-counter pain relievers such as acetaminophen or ibuprofen for managing pain and fever.
18. Antihistamines: Provide relief for allergic reactions, insect bites, or seasonal allergies.
19. Sterile Eyewash Cup: Use for irrigating the eyes in case of chemical exposure or irritation.
20. Emergency Contact Information: Include a list of emergency contacts, including local emergency services, poison control, and personal contacts.
Additional Considerations:
Customise your first aid kit based on the specific needs of your household, including any medical conditions or allergies.
Check your first aid kit regularly to ensure that supplies are not expired or depleted, and replenish items as needed.
Store your first aid kit in a cool, dry place out of reach of children but easily accessible in case of emergencies.
Consider additional items such as a flashlight, batteries, and a basic first aid guidebook for extended emergencies or power outages.
Having a well-equipped home first aid kit and being prepared to handle common injuries and emergencies can provide peace of mind and help you respond effectively when accidents occur.
Creating a travel first aid kit
Creating a travel first aid kit is essential for staying prepared while on the go, whether you're traveling locally or abroad. Here's a list of essentials for a travel first aid kit:
1. Compact Container: Choose a durable, waterproof container that is lightweight and easy to carry, such as a small zipper pouch or a travel-sized first aid kit bag.
2. Adhesive Bandages: Various sizes and shapes to cover minor cuts, scrapes, and blisters.
3. Sterile Gauze Pads: Use for covering larger wounds or as a primary dressing for more severe injuries.
4. Adhesive Tape: Secure gauze pads and bandages in place.
5. Antiseptic Wipes or Solution: Clean wounds and prevent infection.
6. Antibiotic Ointment: Apply to minor cuts and scrapes to prevent infection.
7. Tweezers: For removing splinters, ticks, or other foreign objects from the skin.
8. Scissors: Use for cutting adhesive tape, gauze, and clothing in case of injury.
9. Thermometer: Compact, digital thermometers are easy to use and can help monitor fevers.
10. Non-Latex Gloves: Protect against contamination and infection when providing first aid.
11. Instant Cold Packs: Use to reduce swelling and relieve pain for minor injuries.
12. Pain Relievers: Include over-the-counter pain relievers such as acetaminophen or ibuprofen for managing pain and fever.
13. Antihistamines: Provide relief for allergic reactions, insect bites, or seasonal allergies.
14. Anti-diarrheal Medication: Pack a small supply of anti-diarrheal medication for gastrointestinal discomfort.
15. Oral Rehydration Salts: Useful for rehydrating in case of dehydration due to diarrhoea or vomiting.
16. Motion Sickness Medication: If you're prone to motion sickness, consider packing medication to alleviate symptoms.
17. Sunscreen: Choose a travel-sized sunscreen with broad-spectrum protection to prevent sunburns and skin damage.
18. Insect Repellent: Protect against insect bites and vector-borne diseases by packing insect repellent containing DEET or picaridin.
19. Travel-sized Hand Sanitiser: Keep hands clean and prevent the spread of germs while traveling.
20. Personal Medications: Pack a sufficient supply of any prescription medications you take regularly, along with a copy of your prescriptions.
21. Emergency Contact Information: Include a list of emergency contacts, including local emergency services and personal contacts, in case of emergencies.
Additional Considerations:
Customise your travel first aid kit based on your destination, activities, and specific medical needs.
Check travel restrictions and regulations regarding medications and medical supplies for your destination.
Pack your travel first aid kit in a carry-on bag or easily accessible location to ensure it's readily available during your journey.
Having a well-stocked travel first aid kit can help you handle minor injuries, illnesses, and emergencies while traveling and provide peace of mind knowing that you're prepared for the unexpected.
Emergency preparedness planning for individuals and families
Emergency preparedness planning is crucial for individuals and families to ensure safety and resilience in the face of various emergencies, including natural disasters, accidents, and other unforeseen events. Here's a step-by-step guide to creating an emergency preparedness plan:
1. Assess Risks: Identify potential hazards and risks in your area, such as hurricanes, earthquakes, floods, wildfires, or industrial accidents. Consider both natural and human-made disasters.
2. Create a Communication Plan: Establish a communication plan with family members or household members. Determine how you will stay in touch during an emergency, including designated meeting places, emergency contacts, and communication methods (e.g., phone calls, text messages, social media).
3. Develop an Evacuation Plan: Create an evacuation plan for your home or neighbourhood in case you need to evacuate quickly. Identify evacuation routes, shelter locations, and transportation options. Practice evacuation drills with your family members regularly.
4. Assemble Emergency Supplies: Prepare an emergency kit with essential supplies to sustain you and your family for at least 72 hours. Include items such as water, non-perishable food, first aid supplies, flashlights, batteries, blankets, personal hygiene items, medications, and important documents (e.g., identification, insurance information, medical records).
5. Secure Your Home: Take steps to secure your home and mitigate potential hazards. Install smoke detectors, carbon monoxide detectors, and fire extinguishers. Secure heavy furniture, appliances, and objects that could fall during an earthquake or severe weather.
6. Stay Informed: Stay informed about potential emergencies and local hazards by monitoring weather alerts, news updates, and official announcements from emergency management authorities. Sign up for emergency alerts and notifications from local authorities and government agencies.
7. Learn Basic First Aid and CPR: Take a first aid and CPR course to learn essential lifesaving skills. Be prepared to administer first aid and provide assistance to family members or neighbours in case of injuries or medical emergencies.
8. Plan for Special Needs: Consider the specific needs of family members, including children, elderly individuals, individuals with disabilities, or pets. Make arrangements to accommodate their needs in your emergency preparedness plan.
9. Maintain Emergency Supplies: Regularly check and update your emergency kit and supplies to ensure they are in good condition and not expired. Rotate perishable items and replace batteries as needed.
10. Practice Your Plan: Practice your emergency preparedness plan with your family members or household members regularly. Conduct drills for different types of emergencies, such as fire drills, earthquake drills, or evacuation drills.
11. Review and Revise Your Plan: Periodically review and revise your emergency preparedness plan to account for changes in your family's circumstances, new hazards, or lessons learned from past emergencies. Update contact information, evacuation routes, and emergency supplies as needed.
By following these steps and creating a comprehensive emergency preparedness plan, you can better protect yourself, your family, and your community in the event of an emergency. Remember that preparedness is key to resilience and recovery in the face of adversity.
Course Review and Assessment
Review of key concepts and skills covered in the course
Here's a comprehensive review of the key concepts and skills covered in this course on emergency preparedness:
1. Risk Assessment:
Identify potential hazards and risks in your environment, including natural disasters (e.g., earthquakes, hurricanes, floods), accidents, and other emergencies.
Assess the likelihood and potential impact of each hazard to determine the level of risk.
2. Communication Planning:
Establish a communication plan with family members, household members, and emergency contacts.
Determine primary and alternative communication methods, such as phone calls, text messages, social media, and designated meeting places.
Practice communication drills to ensure everyone knows what to do in an emergency.
3. Evacuation Planning:
Develop an evacuation plan for your home or workplace, including designated evacuation routes, assembly points, and shelter locations.
Consider the specific needs of family members, pets, and individuals with disabilities when planning for evacuation.
4. Emergency Supplies:
Prepare an emergency supply kit with essential items to sustain you and your family for at least 72 hours.
Include water, non-perishable food, first aid supplies, medications, clothing, blankets, flashlights, batteries, and important documents (e.g., identification, insurance, medical records).
Regularly check and update your emergency supplies to ensure they are in good condition and not expired.
5. Home Security:
Take measures to secure your home and mitigate potential hazards, such as installing smoke detectors, carbon monoxide detectors, and fire extinguishers.
Secure heavy furniture, appliances, and objects to prevent injury during earthquakes or severe weather events.
6. Stay Informed:
Stay informed about potential emergencies and local hazards by monitoring weather alerts, news updates, and official announcements from emergency management authorities.
Sign up for emergency alerts and notifications from local authorities and government agencies.
7. First Aid and CPR:
Learn basic first aid and CPR skills to provide assistance in case of injuries or medical emergencies.
Know how to recognise and respond to common medical emergencies, such as choking, cardiac arrest, bleeding, burns, and allergic reactions.
Take a first aid and CPR course to gain hands-on training and certification.
8. Special Needs Planning:
Consider the specific needs of family members, including children, elderly individuals, individuals with disabilities, and pets, when creating your emergency preparedness plan.
Make accommodations for mobility, medical care, medications, and communication needs in your plan.
9. Practice and Review:
Practice your emergency preparedness plan regularly with drills and exercises to ensure everyone knows their roles and responsibilities.
Conduct periodic reviews and updates to your plan based on changes in your environment, family dynamics, or lessons learned from past emergencies.
By understanding these key concepts and skills and taking proactive steps to prepare for emergencies, you can enhance your safety, resilience, and ability to respond effectively in times of crisis.
The End
Anytime Care 2020 Ai Assistant